Wednesday, August 15, 2007

Moved in on July 4th!


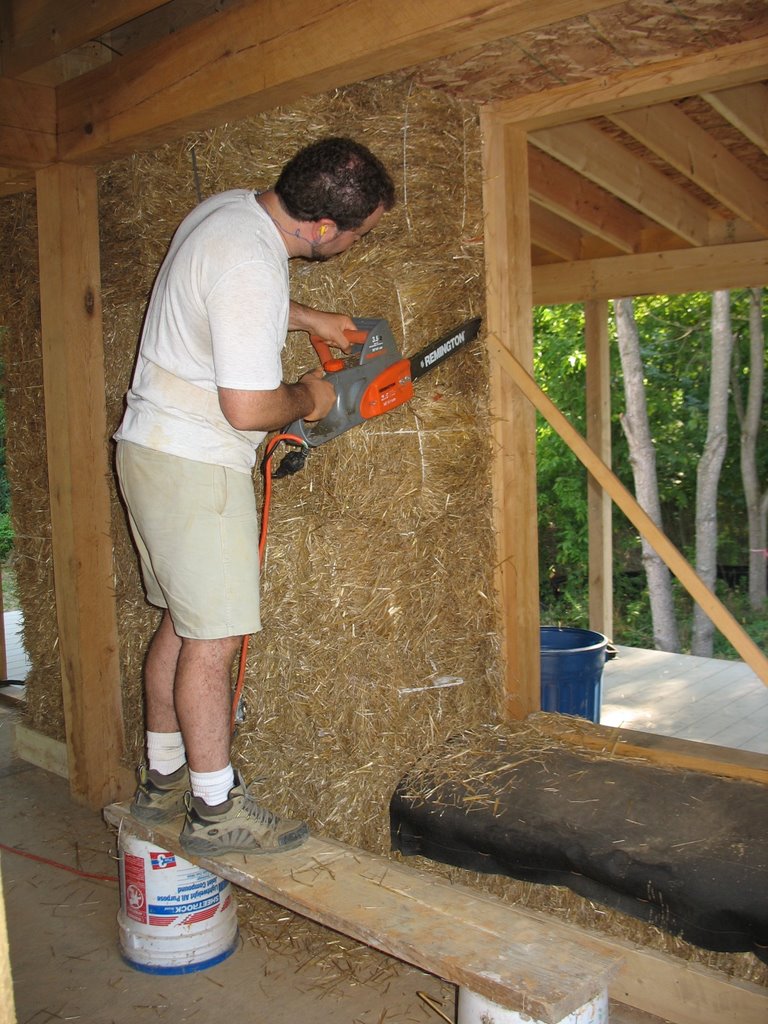
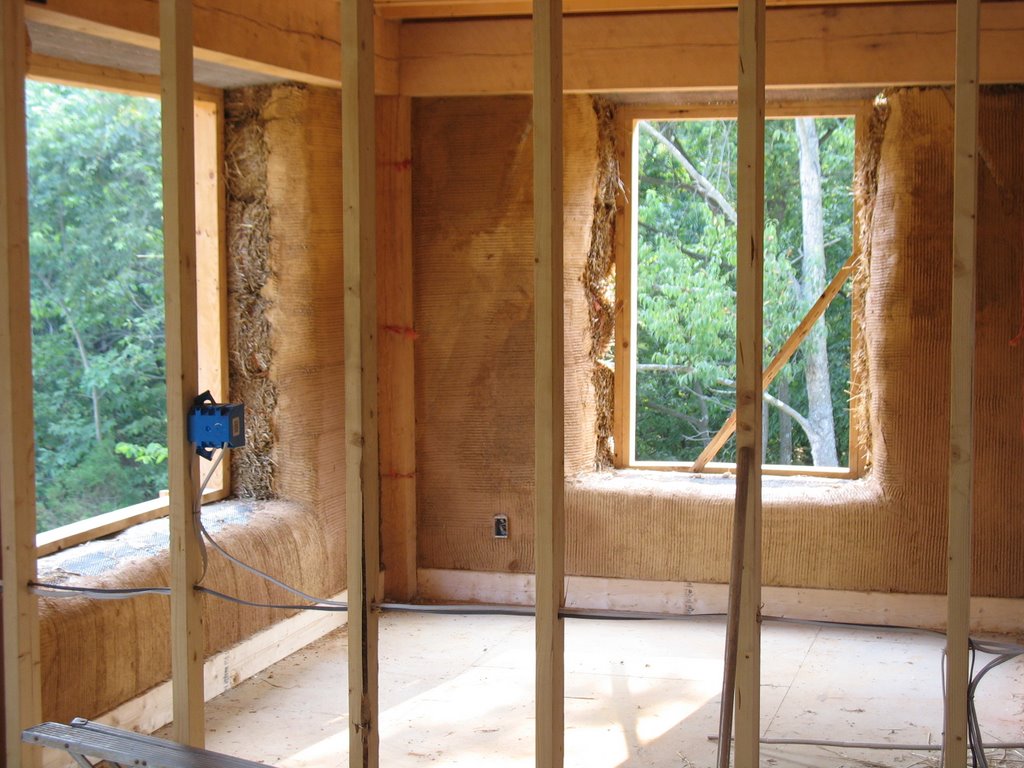
We first laid eyes on our five-acre property in September of 2002. We bought the land almost a year later. We met our architect, Sigi Koko, in November of 2003 and began the design process for our house in February of 2004. We broke ground and began construction in August of 2005. Now, here we are two years later, finally living in this house we've held in our dreams for so long.


How about a little tour of the finished (it'll never really be finished) product?


Here's our entryway, with a view into the mudroom to the right . . .


And here's the view from the mudroom into the entryway . . .


The earthen (clay) floors we originally installed didn't set up properly and had to be removed. We replaced them with a tried and true concrete floor. Before pouring this floor, we laid radiant heat tubing down, pouring the concrete over top of them. This will provide the opportunity to add an additional heat source to the house sometime the future. The concrete floors were eventually stained to achieve a rich adobe clay color.


Here are a few shots of the kitchen. The cabinetry is made from compressed wheatboard with a sustainably-harvested cherry veneer. The counter tops are made from recycled office paper. There are no glues or formaldehyde-based binders in either the cabinets or the counter tops. All appliances are EnergyStar certified for energy efficiency and water conservation.


This is an induction cooktop. It looks like a regular glass-topped electric unit but it operates quite differently. Induction cooktops use magnetic fields to excite the molecules of ferrous metal (steel or iron) cookware to create heat. The pot gets hot, the food gets hot, but the burner itself stays relatively cool to the touch. This is not only safer but also much more energy efficient than either standard electric or gas cooktops.


Moving upstairs now, here's a shot of our bedroom. The floors in here are cherry, from a tree that blew down on Kristin's parent's farm. We also harvested a maple in the same way, using it for flooring in one of the other bedrooms. The leftover cherry and maple found their way into two windows seats, bathroom vanities and other assorted uses around the house.


We have a small balcony of our bedroom . . .


We did manage to salvage one small section of earthen floor. This is the area we call the commons, situated at the top of the stairs with the three bedrooms opening into it . . .


And just a few additional random images from around the house . . .


And that about does it. Thanks for your interest. If you ever find yourself in the neighborhood, be sure to stop on by and check the place out firsthand.


Sunday, December 17, 2006

Still Coming Along . . .

It's been several weeks now since we began plastering the exterior of the house. Lime plaster (a mix of lime putty and sand) is applied right over the strawbale walls. The lime reacts with CO2 in the atmosphere and "carbonates" back into limestone, forming a very durable and breathable protective shell.


We're going for an earthy tan color for the final plaster coating and began experimenting with pigmenting the plaster. We never did get quite the color we were after and so we've decided to simply apply the final coat of plaster without pigment and plan to apply a colored lime wash sometime this spring.


The final coat of plaster goes on grayish and dries to a fairly bright white. The plaster is troweled smooth and hard and then lightly sponged to its final texture.


Meanwhile, in the interior of the house . . .

Sheetrock is being hung and windows are being trimmed.


Monday, August 21, 2006

Mud on the walls . . .

A few weeks ago, we began plastering the interior strawbale walls. The first step was to build a practice wall so we could experiment with various recipes and application techniques for both the earthen plaster for the interior and the lime plaster for the exterior. The wall includes both inside and outside corners so we can hone our technique for applying plaster to curves. Eventually the wall will be taken down.


The bale walls must be prepped before the plaster can be applied to them. It helps to go around and fill in all of the seams, gaps, depressions, etc. with either a basecoat of plaster or a material called cob which is a very sticky mix of clay and straw.


Seams between the bales and gaps around an electrical box are prepped with plaster . . .


Kristin stomps cob, mixing the wet clay with the straw to the right consistency . . .


Jeff uses an electric chainsaw to even up a window jamb before applying plaster . . .


Kristin applies cob to even out a door jamb . . .


And now we're ready to put some plaster up on the walls. It will be a three-coat process. Here are some pictures of the first or what is known as the scratch coat . . .


Strawbale walls, earthen plaster and clay-straw cob afford lots of opportunity to be creative and so we took advantage of this by creating some unique features in the walls. Here's a little niche we carved into the wall with the chainsaw. It has been coated with a cob mixture to help it keep its shape . . .


And here's the niche again after a little more plaster and cob work . . .


With plaster soon to completely cover the bale walls inside and out, all evidence of there being straw in the walls would be hidden but for the tradition of strawbale homeowners installing a Truth Window. Here's the one Kristin sculpted out of cob to allow unbelieving visitors to our house see for themselves . . .


Framing work has also been moving forward along with the plastering. A post and beam roof structure will protect the doorway from the dining room out to an eventual stone patio . . .


And the roof over the screened porch has been completed as well . . .


Thanks for visiting! More to come . . .

Monday, July 03, 2006

Masonry Heater, Composting Toilet & Other Areas of Progress . . .


The barn is now fully sided. We used a cement fiberboard material laid up in board and batten style . . .


A screened-in porch will be attached to the west side of the house just off the livingroom. Here the framing for the porch deck is up and the decking is being laid. The decking material we're using is 100% recycled polyethelyne from old milk jugs.


The masonry heater came as a series of pre-cast concrete pieces that get assembled like a 3-dimensional puzzle. Each piece is numbered according to its place in the assembly process.


Here's the heater fully assembled and starting to get faced with stone. The larger square opening toward the bottom of the heater is the firebox while the smaller top opening is a bake oven for bread, pizza, etc.


The masonry heater is now fully faced with stone and the chimney is starting to rise up through the levels of the house on its way out through the roof . . .


The plumbing has been roughed-in. No water lines can run in the bale walls but it's okay to run drainlines and vents in the straw. The PEX water lines run in the framed partition walls and through the floor joists in the ceilings . . .


The composting toilet unit is assembled in the basement with the toilet chutes running to each of the three toilet locations. The photo here shows the 1st floor bathroom with the short chute capped by the orange board indicating where the toilet will eventually sit. The two other chutes on either side of this toilet run to the two toilets in the upstairs bathrooms.


More to come . . .